發表文章

目前顯示的是有「Linux」標籤的文章

Linux 事件驅動筆記

圖片
 I/O Model Synchronous I/O Blocking Non-Blocking I/O multiplexing Asynchronous I/O Blocking 跟 Non-Blocking 差異只差在 選擇 ! Blocking 以 read (read from a file descriptor) 來舉例, 從 user space 發出 read (kernel提供的 system call) 之後, 這時候就會切換到 kernel mode,kernel 會依據給定的 file descriptor 去判斷, 這個 fd 來自哪裡,接下來等待資料,因為 kernel space 跟 user space 本身就是 isolated, 這樣在 user space 的 process crash,也不會影響到 kernel space, 所以 kernel space 拿到資料之後,因為 isolated 的關係,要將資料複製到 user space 去。 在這個過程中,user space 的 read 基本上就是一直在等結果。 read 如果失敗會有 err number 可以注意 EAGAIN EWOULDBLOCK Non-blocking 就是類似一直來問 read 目前的狀態, kernel 回到 user space 可能裝置還沒準備好,或是要等之後的操作才會生效, 這時候就會發出 EAGAIN 的錯誤,EAGAIN 不代表是真的錯誤,再試一次可能就可以, I/O Multiplexing (這個邏輯跟數位邏輯的 mux 很像,故取做 IO multiplexing) multiplexing => 有多個輸入(input), 可以透過一個 select 去決定輸出 假設 Linux 要等待很多種資料, 就可以用這個概念,去監控哪個 fd 有資料, 有資料的話就挑選出來! 所以 I/O Multiplexing 本質還是 blocking,只是可以一次監聽多個 所以像網頁伺服器要監聽很多個 incoming request,就可以用這種方式處理 select 單個 process 可以被監聽的 fd 數量有限制 (跟這個 /proc/sys/fs/file-max 有關) 因為是一個一個詢問(輪詢),所以監聽...

[Linux] SSH Tunnel

前情提要 由於中華電信最近除了海底纜線斷掉之外,連內部路由都有問題,造成部分用戶的 socket 會連不到我們架設的伺服器,於是想到把自建的 socket server 從機房中複製一份到 GCP 上面。 但由於安全性的問題,資料庫是在機房內網,且沒有對外 IP,還有 redis 也是在機房內網,同樣沒有對外 IP,這時候該怎麼辦? 厲害同事介紹了一招,SSH Tunnel。 SSH Tunnel 單純就是幫忙做 Port Forwarding。 假設我現在我有台主機 A,需要連線到內網的資料庫,但只有主機 B 才可以直接透過內網連線到資料庫,則我們可以透過 SSH Tunnel 將內網資料庫的 3306 port,對應到主機 A 的自定義 port,流量則是透過主機 B 轉給內網的資料庫。 定義一下名詞: 主機 A => socket server 主機 B => ap 資料庫 => db 1. 先在 db 內開一個專門用來 ssh 的帳號,假設叫 tunneluser 2. 在 db 開的 tunneruser 的 ~/.ssh/authorized_keys 內新增 socket server 的 public key 3. 在 ap 內開一個專門用來 ssh 的帳號,假設叫 tunneluser 4. 在 ap 開的 tunneruser 的 ~/.ssh/authorized_keys 內新增 socket server 的 public key 5. 接下來在 socket server 上的 ~/.ssh/config內新增 Host ap HostName 1.2.3.4 User tunneluser Port 22 IdentityFile ~/.ssh/id_rsa Host db HostName 2.2.3.4 Port 22 User tunneluser ProxyCommand ssh -q -W %h:%p ap IdentityFile ~/.ssh/id_rsa 6. 接著在 socket server 中輸入 nohup ssh -N -L 3306:localhost:3306 db & nohup 跟後面的 & 是為了把 ssh tunnel 放在背景持續執行 第一個 3306 是 so...

[Ubuntu] vm主機做 resize 時遇到的問題

圖片
前情提要: 公司舊有主機當初用 vmware 建立時分配到 100G,然而實際上能用的只有(/dev/sda1)50G,但時間久了,容量不夠用,這時候從 vmware 介面去加大硬碟之後,一樣沒辦法將 /dev/sda1 變大。 # fdisk -l 處理方法與過程: 依照以前在 aws 上面的處理經驗,理論上是使用 growpart /dev/sda 1 resize2fs /dev/sda1 就可以解決,然侯事情不是我想的這麼簡單,過程中都出現 NO CHANGE 看起來是行不通了,於是! 查了一下各路文章發現,需要把 partition table 整個洗掉,重新建立新的 partition table。 過程: 第一件最重要的事情,就是 備份 。如果不備份,失敗的話就可以跑路了XD 再來使用指令 # fdisk /dev/sda 使用了之後,會進去 fdisk 的互動模式,接著介紹指令 p => 印出目前的指定硬碟的分割表 d => 刪除指定的分割,ex: 輸入1就代表刪除 /dev/sda1 的 partition 的位置 (使用 d 的話,後面會問你要刪除哪個硬碟裝置代號) n => 新增指定的分割,ex: 輸入1就代表新增 /dev/sda1 的 partition 的位置 (使用 n 的話,後面會問你這個新的硬碟裝置代號,sector( 磁區 ) 要從哪裡開始) w => 寫入 partition table 以下是大概會出現 moses@xxx:~$ sudo su - root@xxx:~# fdisk -l Disk /dev/sda: 150 GiB, 161061273600 bytes, 314572800 sectors Units: sectors of 1 * 512 = 512 bytes Sector size (logical/physical): 512 bytes / 512 bytes I/O size (minimum/optimal): 512 bytes / 512 bytes Disklabel type: dos Disk identifier: 0x9e13d85c Device Boot Start End Sectors Size Id T...

[Linux] Ubuntu 20.04 upgrade 時遇到的問題

在每次做 apt upgrade 時,總是會出現以下類似以下的錯誤 dpkg: error processing package linux-image-4.4.0-121-generic (--configure): subprocess installed post-installation script returned error exit status 2 dpkg: dependency problems prevent configuration of linux-image-extra-4.4.0-121-generic: linux-image-extra-4.4.0-121-generic depends on linux-image-4.4.0-121-generic; however: Package linux-image-4.4.0-121-generic is not configured yet. dpkg: error processing package linux-image-extra-4.4.0-121-generic (--configure): dependency problems - leaving unconfigured dpkg: dependency problems prevent configuration of linux-image-generic: linux-image-generic depends on linux-image-4.4.0-121-generic; however: Package linux-image-4.4.0-121-generic is not configured yet. linux-image-generic depends on linux-image-extra-4.4.0-121-generic; however: Package linux-image-extra-4.4.0-121-generic is not configured yet. dpkg: error processing package linux-image-generic (--configure): dependency problems ...

[Linux] CentOS 6 安裝 Node.js v.12 血淚過程

ref:  https://forums.centos.org/viewtopic.php?t=68077#p285857 https://blog.51cto.com/kindit/1563889 https://cloud.tencent.com/developer/article/1463094 yum install centos-release-scl-rh yum install devtoolset-7-toolchain scl enable devtoolset-7 bash 就可以用比較新的 devtool 去編譯檔案了!

[Linux] public key is not available: NO_PUBKEY 6B05F25D762E3157

解法: sudo apt-key adv --keyserver keyserver.ubuntu.com --recv-keys 762E3157. Ref:  https://travis-ci.community/t/then-sudo-apt-get-update-failed-public-key-is-not-available-no-pubkey-6b05f25d762e3157-in-ubuntu-xenial/1728

[資安] Linux主機被安裝門羅幣挖礦

由於發現主機CPU時常高達400%.. 所以用先檢查一下 top => press c 或是直接 ps aux | grep redis2 發現是一隻 ./redis2 的程式 ./redis2 --donate-level 1 -o ve01.kieuanilam.me:5555 -u tt2re -p tt2re -k -B 大概追查了一下 這個形式蠻像是門羅幣挖礦在用的格式 後來去看一下相關的文章基本上可以肯定就是在挖門羅幣了 https://blog.csdn.net/qq_39919755/article/details/90258890 https://blog.csdn.net/m0_37847558/article/details/93074293 https://kknews.cc/zh-tw/tech/kbmmx98.html 後來直接使用 kill {pid} -9 直接停止 但發現變成了 zombie process (ref:  https://yq.aliyun.com/articles/34967 ) 但沒幾天又被打開挖礦程式,後來使用 find / -name redis2 發現檔案是在 redis 的 container 進去 redis 的 container 看了一下 發現裡面的 authorized_keys 內有個不知名的 key 感覺就是這個了 看起來攻擊手法是透過 redis container 去挖礦 後來改成直接在 local 安裝 redis-server 因為 docker 會讓防火牆設定直接無效 除非特別針對 DOCKER 或是 DOCKER-USER 這個角色去設定 (ref:  https://docs.docker.com/network/iptables/ ) 中間跑去檢查 /etc/passwd 有沒有多可疑用戶 跑去目前所有既有的用戶去看有沒有被新增奇怪的 ssh key 還好最後有找到!

[Mac] 使用 wrk 時,出現 Too many open files

Ref:  https://superuser.com/questions/433746/is-there-a-fix-for-the-too-many-open-files-in-system-error-on-os-x-10-7-1 可以使用 sysctl -w kern.maxfiles=60000 sysctl -w kern.maxfilesperproc=60000 來增加可開啟檔案的上限, 如果是一般 linux 的話,可以使用 ulimit -HSn 60000

[Linux] Linux 流量監測工具 - iftop

Ref: https://www.tecmint.com/iftop-linux-network-bandwidth-monitoring-tool/ https://www.adamfei.com/iftop-linux-traffic-monitoring-tool-most-comprehensive-iftop-tutorial/ https://blog.gtwang.org/linux/iftop-linux-network-traffic-monitor/ 不得不說 iftop 真的非常好用 安裝 # 在CentOS/RedHat中需要安裝epel-release yum install epel-release yum install iftop apt-get install iftop # 假設系統太老舊無法使用yum/apt安裝的話可以自己編譯 yum install flex byacc libpcap ncurses ncurses-devel libpcap-devel # Debian系列的使用以下 apt-get install flex byacc libpcap0.8 libncurses5 wget http://www.ex-parrot.com/pdw/iftop/download/iftop-0.17.tar.gz tar zxvf iftop-0.17.tar.gz cd iftop-0.17 ./configure make && make install 常用方法: # 把 ip, port 都顯示出來 iftop -P # 指定網卡, 如果一開始使用iftop會跑出 # pcap_open_live That device is not up 這種訊息 # 就可以使用指定網卡這招 iftop -i eth0 TX:發送流量 RX:接收流量 TOTAL:總流量 Cumm:執行 iftop 到目前時間的總流量 peak:流量峰值 rates:分別表示過去 2s 10s 40s 的平均流量 常用的參數 -i 設定監測的網卡,如:# iftop -i eth1 -B 以 bytes 為單位顯示流量(預設是 bits),如:# iftop -...

[Linux] 在CentOS5上面建立redis

當需要自己手動make redis的時候 連到 https://redis.io/download wget http://download.redis.io/releases/redis-4.0.11.tar.gz tar zxfv redis-4.0.11.tar.gz cd redis-4.0.11 如果tcl版本沒有到8.5, 在 make test 的時候會出錯 這時候就直接用以下三個指令, 不要 make test make clearn make make install 這時候基本上就已經裝好redis server了 在 /usr/local/bin/redis-server 這時候要先在建立存放 redis.conf 的地方 mkdir -p /etc/redis cd /etc/redis && wget http://download.redis.io/redis-stable/redis.conf 接著把 redis 做成系統服務: # redis script 的內容如下 # nohup 是讓程式不因離開 ssh 而中斷, &是放入背景執行 vi /etc/init.d/redis touch /var/log/redis.log chkconfig --add redis chkconfig redis on # 啟動/停止 redis /etc/init.d/redis start /etc/init.d/redis stop Ref:  https://www.linode.com/docs/databases/redis/redis-on-centos-5/ !/bin/sh # # Simple Redis init.d script conceived to work on Linux systems # as it does use of the /proc filesystem. ### BEGIN INIT INFO # Provides: redis_6379 # Default-Start: 2 3 4 5 # Default-Stop: 0 1 6 # Short-Descriptio...

[Shell] 同時跑N個 PHP Process

#!/bin/bash ### 定義顏色 YELLOW='\033[1;33m' GREEN='\033[0;32m' NC='\033[0m' ### 要執行的PHP程式, 預設是/path/to/xxx.php PHP_PROGRAM=${1:-/path/to/xxx.php} ### 指定國家, 預設是tw COUNTRY=${2:-tw} ### 根據哪個檔案, 預設是test.txt TARGET_FILE=${3:-test.txt} ### 檔案名稱, 預設是test FILE_NAME=${4:-test} ### 同時跑PHP進程數, 預設是8 CONCURRENT_PROCESS=${5:-8} echo -e "${YELLOW}開始執行${NC}" for i in $(seq 1 $CONCURRENT_PROCESS) do echo -e "${GREEN}/usr/local/php/bin/php $PHP_PROGRAM $COUNTRY $TARGET_FILE $FILE_NAME $CONCURRENT_PROCESS $(($i-1)) 18${NC}" /usr/local/php/bin/php $PHP_PROGRAM $COUNTRY $TARGET_FILE $FILE_NAME $CONCURRENT_PROCESS $(($i-1)) 18 & done echo -e "${YELLOW}執行完畢, 可以執行 ${NC} ps aux | grep $PHP_PROGRAM ${YELLOW} 觀看執行process ${NC}" exit;

laravel 5.4 所需環境指令

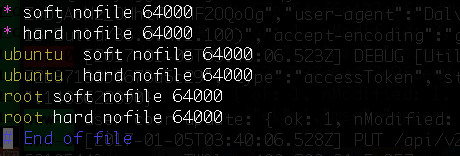
主機環境: apt-get update && apt-get install -y git echo "* soft nofile 64000" >> /etc/security/limits.conf echo "* hard nofile 64000" >> /etc/security/limits.conf echo "root hard nofile 64000" >> /etc/security/limits.conf echo "root hard nofile 64000" >> /etc/security/limits.conf echo "session required pam_limits.so" >> /etc/pam.d/common-session echo "session required pam_limits.so" >> /etc/pam.d/common-session-noninteractive echo "ulimit -HSn 64000" >> /etc/profile apt-get install -y imagemagick libmagickwand-dev libmagickcore-dev add-apt-repository ppa:ondrej/php && apt-get update apt-get install -y php5.6 \ php5.6-xml \ php5.6-dev \ php5.6-fpm \ php5.6-mysql \ php5.6-mbstring \ php5.6-curl \ php5.6-gd \ php-imagick \ php-redis \ php-memcache apt-get install nginx # 將php5.6-fpm內的設定修改 listen = 127.0.0.1:9000 vi /etc/php/5.6/fpm/pool.d/www.conf sud...

[Linux] 使用 private key產生 public key

如何使用 private key產生 public key: ssh-keygen -y -f ~/.ssh/id_rsa > ~/.ssh/id_rsa.pub

[Linux] 切割超過2TB的硬碟

Ref:  https://blog.gtwang.org/linux/parted-command-to-create-resize-rescue-linux-disk-partitions/ !! 注意 使用parted的指令是即刻生效, 請先確認該顆硬碟是要重新切割的 切割超過2TB硬碟需要用 parted #Ubuntu sudo apt-get install parted #CentOS sudo yum install parted # 進入parted parted # 選擇 /dev/sdc select /dev/sdc # 印出資訊 print # 建立磁碟分割表, 此處硬碟大小為4TB, 故只能使用gpt mklabel gpt # 印出資訊 double check print # 開始分割 mkpart # Partition name? []? my_part1 File system type? [ext2]? (按ENTER) Start? 1 (起始位置) End? 1000000 (結束位置 - 1TB(1000GB)) # mkpart # Partition name? []? my_part2 File system type? [ext2]? (按ENTER) Start? 1000001 (起始位置) End? 2000000 (結束位置 - 1TB(1000GB)) # ls /dev/sdc* # 應該會列出 /dev/sdc1, /dev/sdc2, /dev/sdc3 # 列出資訊 print # 會列出像是下列的資訊 Disk /dev/sdb: 10.7GB Sector size (logical/physical): 512B/512B Partition Table: gpt Number Start End Size File system Name Flags 1 1049kB 1000GB 1000GB my_part1 2 1000GB 2000GB 1000GB my_part2 3 2000GB 4000GB 2000...

[CentOS] 更改主機時區

Ref:  nixCraft CentOS 6 # 備份原本的時區資訊 cp /etc/localtime /root/old.timezone rm /etc/localtime ln -s /usr/share/zoneinfo/America/Chicago /etc/localtime # 驗證 date ls -l /etc/localtime CentOS 7 timedatectl list-timezones ##*** Grep possible Asian timezones ***## timedatectl list-timezones | grep Asia timedatectl set-timezone time_zone timedatectl set-timezone America/Chicago date ls -l /etc/localtime

[Linux] CentOS update kernel from 2.x to 4.x

圖片
Ref1:  https://blog.csdn.net/zy_281870667/article/details/78004010 Ref2:  http://elrepo.org/tiki/tiki-index.php rpm --import https://www.elrepo.org/RPM-GPG-KEY-elrepo.org # 詳細可看 http://elrepo.org/tiki/tiki-index.php rpm -Uvh http://www.elrepo.org/elrepo-release-6-8.el6.elrepo.noarch.rpm yum --enablerepo=elrepo-kernel install -y kernel-lt vi /etc/grub.conf # grub.conf generated by anaconda # default=0 #一般最新安装的内核在第一个位置,将其修改为 0 timeout=5 splashimage=(hd0,0)/boot/grub/splash.xpm.gz hiddenmenu (第一次更新remote kernel覺得緊張)

[Linux] rsync

Ref:  https://blog.gtwang.org/linux/rsync-local-remote-file-synchronization-commands/ https://blog.longwin.com.tw/2012/10/rsync-ssh-different-port-2012/ 安裝: # sudo apt-get install rsync or # sudo yum install rsync 基本用法 rsync 參數 來源檔案/目錄 目的檔案/目錄 -v:verbose 模式,輸出比較詳細的訊息。 -r:遞迴(recursive)備份所有子目錄下的目錄與檔案。 -a:封裝備份模式,相當於 -rlptgoD,遞迴備份所有子目錄下的目錄與檔案,保留連結檔、檔案的擁有者、群組、權限以及時間戳記。 -z:啟用壓縮。 -h:將數字以比較容易閱讀的格式輸出。 遠端備份 從server A上面將某個directory完整備份到 server B 1. 假如server A 用的 ssh port並非 22 port, 可以先設定 ~/.ssh/config Host server_b_ip HostName server_b_ip Port xx 2. rsync -avzh Server_A_Directory user@server_b_ip:Server_B_Parent_Directory ex:  rsync -avzh /root/xxxx/public/videos user@111.222.111.222:/home/user/xxxx/public

[Linux] 利用private key產生public key

ref:  https://askubuntu.com/questions/53553/how-do-i-retrieve-the-public-key-from-a-ssh-private-key ssh-keygen -y -f ~/.ssh/id_rsa > ~/.ssh/id_rsa.pub

[Ubuntu] Linux主機相關指令, 查詢網路狀態,綁定多個ip, 新增使用者相關, 釋放memory, mount, blkid, 防火牆, iptables

顯示Linux主機作業系統相關資訊 $ cat /etc/*release ----------------------------------- 清除沒有釋放掉的memory Ref: 這裏 echo 3 > /proc/sys/vm/drop_caches (3 是指釋放pagecache、dentries與inodes,也就是釋放所有的cache) ----------------------------------- Ref: http://www.arthurtoday.com/2015/01/how-to-add-a-user-as-sudoer-using-the-command-line-in-ubuntu.html $ sudo adduser arthurtoday $ sudo adduser arthurtoday sudo 取消這位使用者的 sudoer 資格 $sudo deluser arthurtoday sudo  將已存在用戶加入到 sudo 的群組 usermod -a -G sudo chris 下面的指令來快速的查一下有那些使用者是有被放進 sudo 和 admin 群組的 $ sudo cat /etc/group | grep sudo $ sudo cat /etc/group | grep admin ------------------------------------ Ubuntu 綁定多個ip在一張網卡上, 舉eth0為例: # vi /etc/network/interfaces auto eth0:1 iface eth0:1 inet static     address xxx.xxx.xxx.xxx     netmask 255.255.255.240 auto eth0:2 iface eth0:2 inet static     address yyy.yyy.yyy.yyy     netmask 255.255.255.240 # ifup eth0:1 # ifup eth0:2 可不同網段! Ref:...

Mongodb 調校過程記錄

圖片
Mongodb