Grafana K6
最近工作需要做壓力測試, 由於 api 有做自定義的加密
在挑選壓力測試工具的時候就先想到了 k6
安裝 K6
mac: brew install k6.
其餘的可以參考這裡: Installation
使用 K6 撰寫 壓力測試腳本
基本的入門測試可以參考網路上其他大神寫的文章
或是參考這裡: Running K6
這裡主要介紹, 如果要透過額外寫 Node.js 的邏輯上去該怎麼處理。
因為 K6 底層是由 Go 撰寫而成的,js 只是對應的介面,
所以要加入 Node.js 邏輯要額外透過 Webpack 處理!
步驟 0 : 先建立對應的目錄
mkdir ./example-project && \
cd "$_" && \
npm init -y
步驟 1 : 安裝會用到的工具
npm install --save-dev \
webpack \
webpack-cli \
@types/k6 \
babel-loader \
@babel/core \
@babel/preset-env \
core-js
步驟 2 : 設定 webpack.config.js
const path = require('path');
const webpack = require('webpack'); // 這是新增的,要引入 webpack。

module.exports = {
  mode: 'production',
  entry: {
    login: './src/login.test.js',
    signup: './src/signup.test.js',
  },
  output: {
    path: path.resolve(__dirname, 'dist'), // eslint-disable-line
    libraryTarget: 'commonjs',
    filename: '[name].bundle.js',
  },
  module: {
    rules: [{ test: /\.js$/, use: 'babel-loader' }],
  },
  target: 'web',
  externals: /k6(\/.*)?/,
  resolve: { // 新增 resolve 配置。
    fallback: {
      buffer: require.resolve('buffer/') // buffer 的 polyfill 路徑。
    }
  },
  plugins: [
    new  webpack.ProvidePlugin({
        Buffer: ['buffer', 'Buffer'] // 使用提供插件來自動注入 Buffer。
    })
  ]
};
註: 這邊的 webpack.config.js 跟官網給的有些不同,我這邊提供的是適合我專案 run 的設定檔。
步驟 3 : 開發壓測邏輯
假設我的目錄結構是
project-root/
│
├ ── src/
│ ├── lib/
│ └──── index.js
│ └── signup.test.js
└── README.md
假設我有個產生驗證簽名的 Nonce function,程式碼如下:
// src/lib/index.js
export const Nonce = (httpMethod, envObj) => {
  if (httpMethod !== 'GET' && httpMethod !== 'POST') {
    return {
      success:  false,
      msg:  'HTTP Method 必須為 GET or POST'
    };
  }

  const { timestamp, postBody } = envObj;
  const key = getKey(Date.now());
  let str = '';
  let encryptedBodyStr = '';
  if (httpMethod  ===  'GET') {
      str = `${key}${requestUrl}`;
  } else  if (httpMethod  ===  'POST') {
      encryptedBodyStr = xxxx.encrypt(postBody, key)
      str = `${encryptedBodyStr}${key}${timestamp}`;
  }
  return [verify(str), encryptedBodyStr];
}
接著在 src/signup.test.js 內的程式碼引用 src/lib/index.js
// signup.test.js
import http from 'k6/http';
import { Nonce } from './lib'
import { check } from 'k6';

const host = `http://127.0.0.1:11111/api`
const memberApi = {
    reg: `/member/register`
}

export default function () {
  // 略
  ...
}
步驟 4 : 編譯
npm run bundle
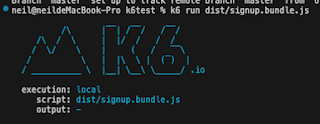
步驟 5 : 執行
npm run dist/xxxx.bundle.js
# 如果是要增加 2 個 virtual user 跟持續時間 10s 可以使用
npm run --vus 2 --duration 10s dist/xxxx.bundle.js
Check
Check 可以用來檢查你所需的欄位的值,是否符合你的預期.
舉例來說:
- Http Status Code 是否為 200.
import { check } from 'k6'; import http from 'k6/http'; export default function () { const res = http.get('http://test.k6.io/'); check(res, { 'is status 200': (r) => r.status === 200, }); } - Response 的 status 欄位是否為 true
const res = http.post(`${host}${memberApi.reg}`, encryptedBody, params)
const resBodyJson = JSON.parse(res.body);
check(res, {
    'API 返回成功':  resBodyJson.status  ===  true
})
常用Option 介紹
- duration
- 持續幾秒, 會跟 virtual user 搭配
- vus
- 幾個 virtual user
- iterations
- 10 個 virtual user, 跑 10 次
 export const options = {
     vus: 10,
     iterations: 100,
 };
- 10 個 virtual user, 跑 10 次

留言
張貼留言